Ok, let’s start from the very start.
Some of this you might already know, but best to be thorough so we haven’t missed anything 
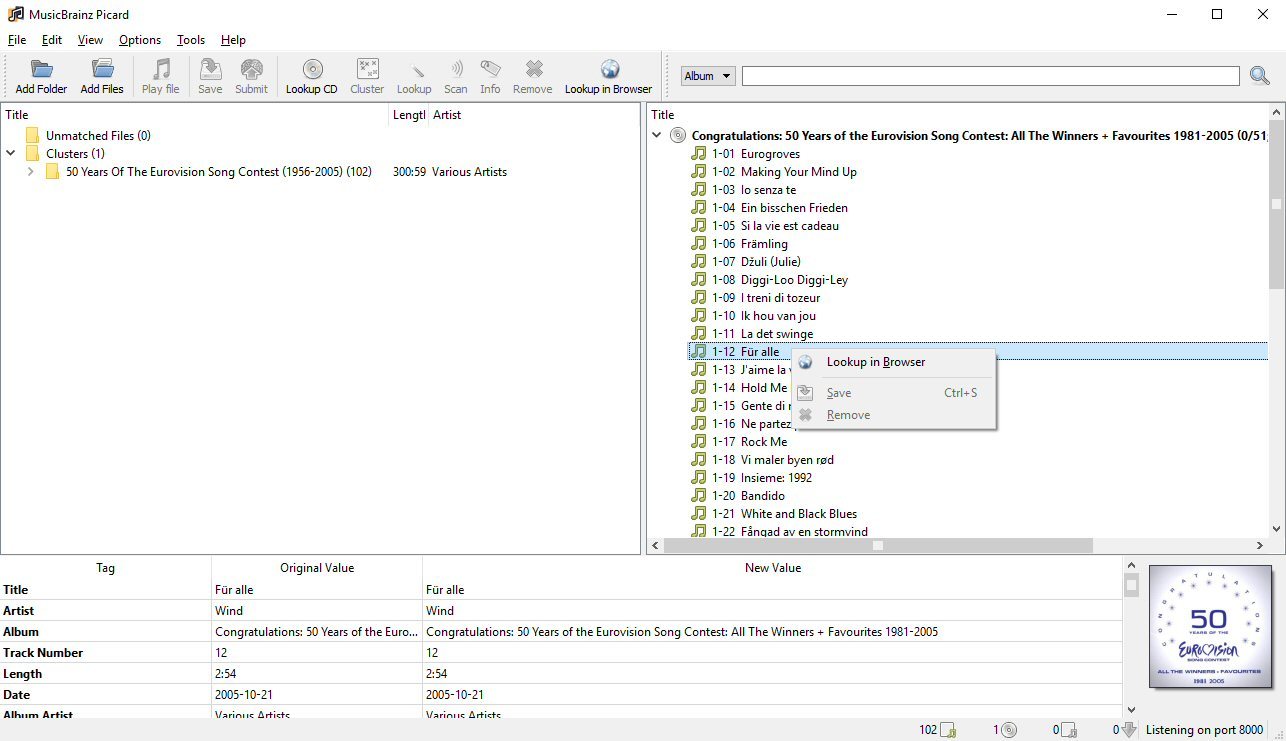
The files on the left hand side represent files on your hard drive, eg mp3s.
The tracks on the right hand side represent releases on MB’s online database.
Hitting ‘Cluster’ will group your tracks on the left hand side together into albums (assuming that information is already present in the existing tags), this is almost always the first button to press after dropping in an album.
You can drag and drop songs in and out of albums.
Now there are 3 ways to match these songs to an album in the MB database (the right hand side):
1. select an album or song on the left hand side, and press ‘Lookup’ - this uses the existing tags from your files to search the MusicBrainz online database for a matching (or closes match) album, and then it will try to automatically match it to a track. This works well if you have whole albums that you’re trying to tag.
2. select an album or song on the left hand side, and press ‘Scan’ - this ignores existing tags, and checks the actual audio data in your file, and searches our AcoustID database for a match, and then matches it to a song in the database (on the right hand side). This will very often lead to false results if you are trying to match to a specific album - as the same song will often appear on many releases, and since it’s ignoring existing tags, it will have to guess what album the track might be from.
3. select an album or song on the left hand side, and press ‘Lookup in Browser’ - this will launch your web browser, and allows you to manually search the MB database for a release. You can also do it without selecting a file first. Now when you browse the website, little green ‘tagger’ icons will appear next to releases on the MusicBrainz website. Clicking that button will put that release into the right hand pane of Picard.
Once the right hand side has been populated with something, you can drag things from the left over to the right, or the other way round. A music note means you haven’t matched a file to that track yet. A green bar means you’ve matched a track and the existing tags are very similar to the data we have on MB, orange means not so much, and red means something is very different (eg track time, artist etc), and it’s a good idea to double check it.
In this example, you’ve populated the right hand pane with an album from the MB database, it has no filepath because it’s not on your hard drive!
If you expand the folder on the left, you can select a track to see its filepath, and if you match a track by dragging it over to the right (or using scan or lookup etc), you can then select it as well.
Hope that helps!